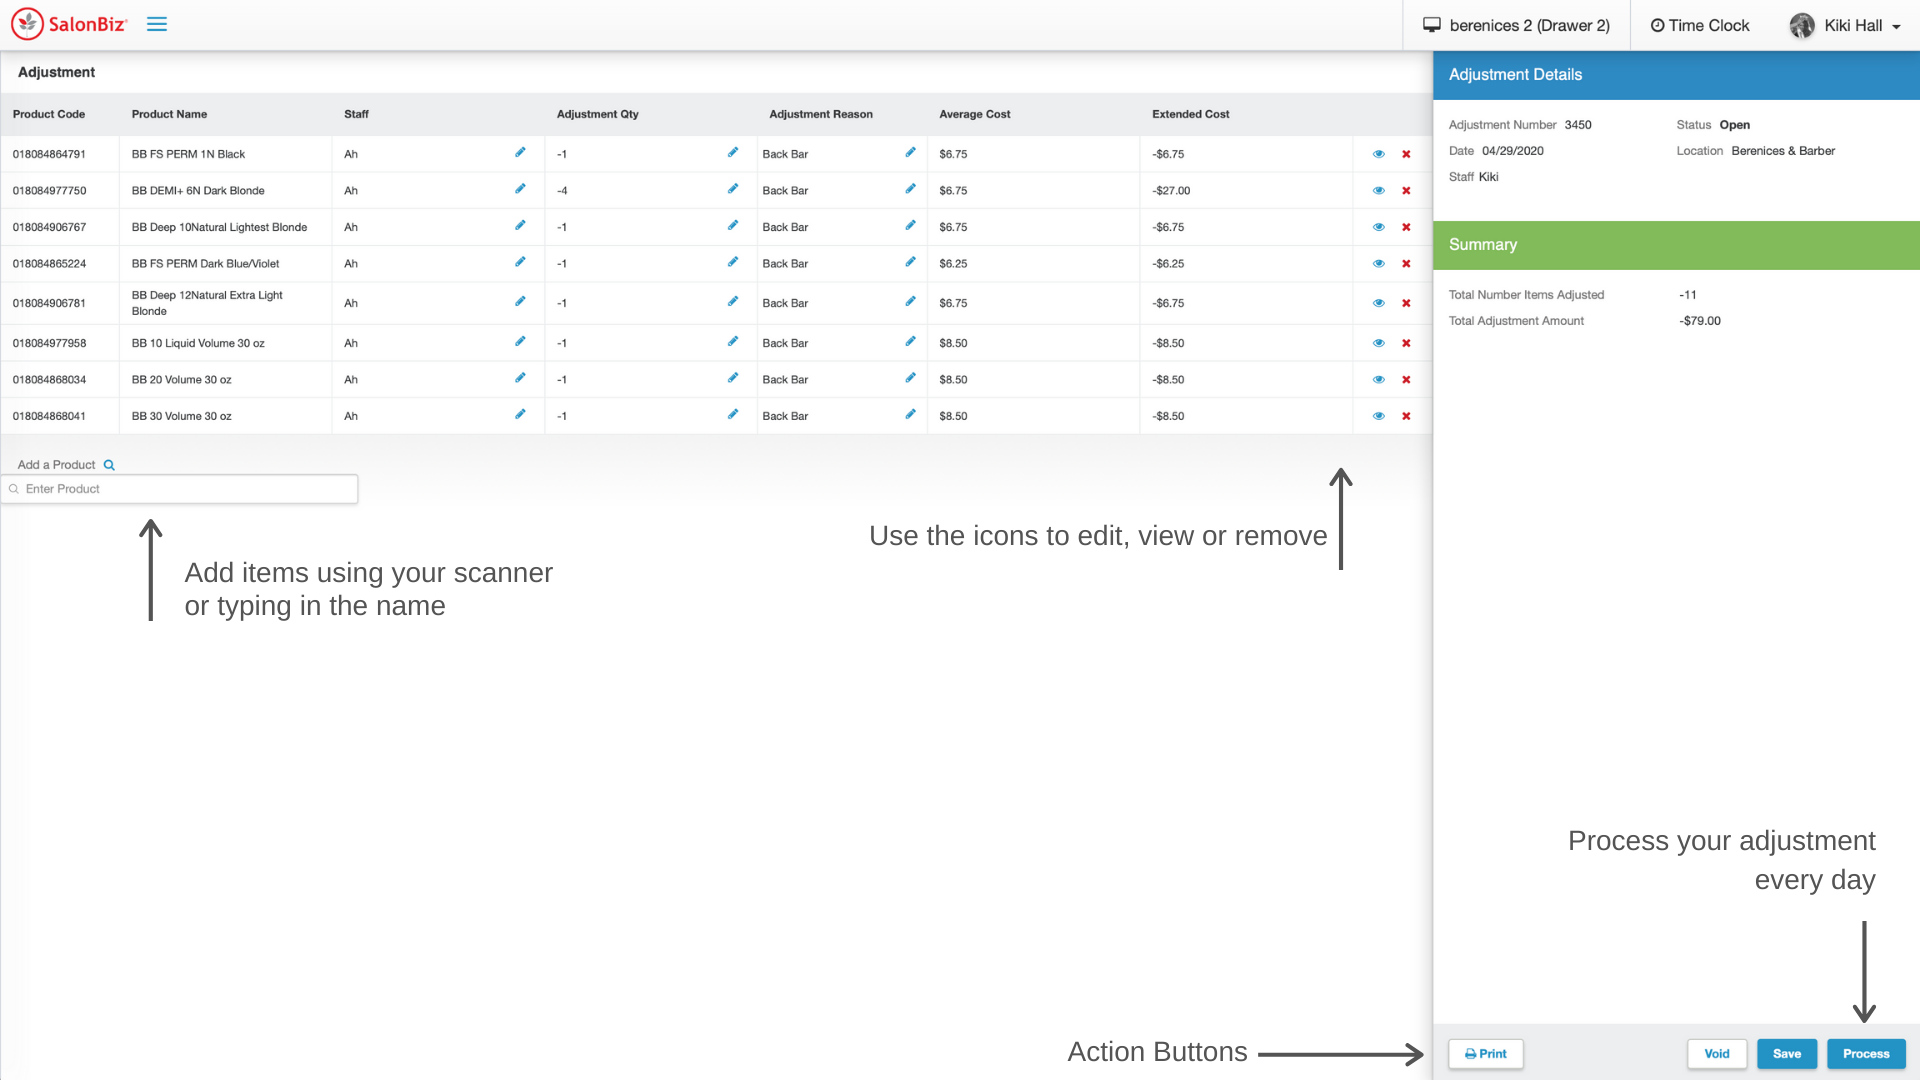
An adjustment is a way to add or remove items from your inventory stock without a sale. You should create an adjustment as soon as an item has been opened, damaged or received. It is a best practice to process open adjustments before you close every day.
- From the Products menu, go to Adjustments.
- Click the View button next to any open adjustment you want to view.
- To start a new adjustment, Click the New Adjustment button
- Click Add Product or Click in the Enter Product field and scan or search by name for an item to add to the adjustment.
- Select the staff doing the adjustment or the staff who used the product(s).
- Select the adjustment reason
- Make sure to change the adjustment reason if the product was used for a different use than the one listed above it.
- Verify the amount in or out in the Quantity field
- The system defaults to negative one, so make sure that you change this number if you are removing more than one item or adding an item.
- Click the icons to view the individual item details or remove the item from the adjustment.
- Your Average Cost is based on the average cost of the item when you receive it.
- Your Extended Cost is the total cost associated with the item being adjusted. (adj qty x avg cost)
- Click Process when you have entered all items to be adjusted.
